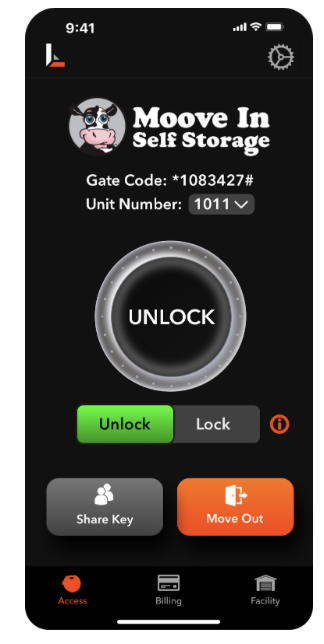
Access
After signing in, you will be sent to the Access screen. This screen will show your gate code and your unit number. If you have multiple units, you can switch between them by pressing the unit number dropdown. From the Access screen, you can also navigate to Key Sharing and Move Out.
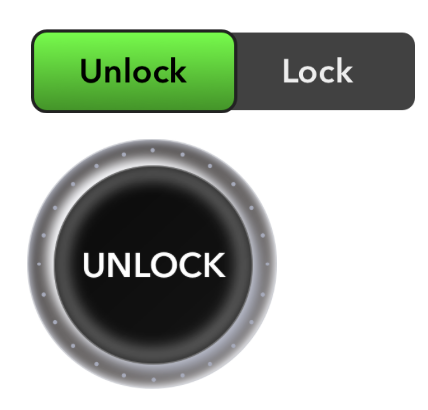
Unlocking Your Lock
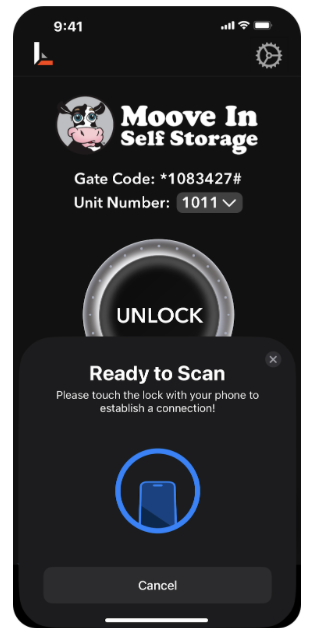
To unlock your lock, first make sure “unlock” is selected and highlighted green on the toggle switch. Then, press the circle Unlock button and follow the NFC scanning instructions.
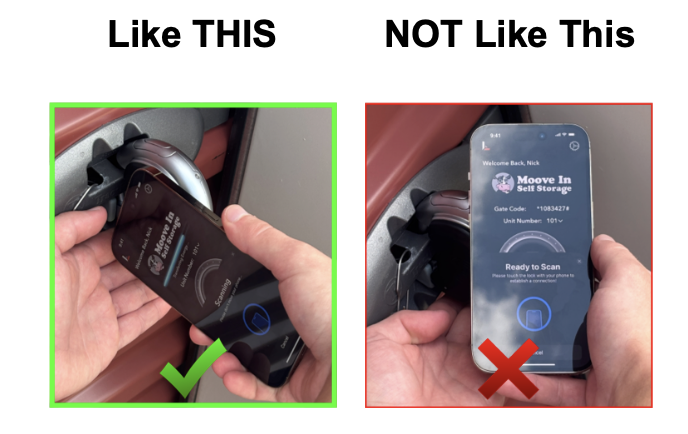
After pressing the unlock button, place the back of your phone up against the black plastic front part of the lock.
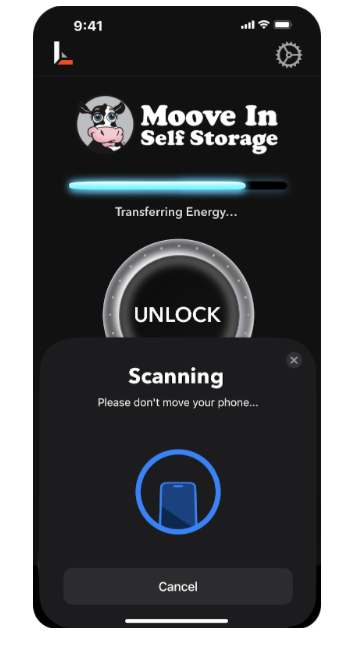
Once you’ve connected with the lock, you’ll see the blue progress bar appear. If you do not see the blue progress bar appear, try moving your phone slowly against the lock until a connection is established. Keep the phone still and held against the lock while this progress bar fills. During scanning, expect to hold your phone to the lock for 4-8 seconds.
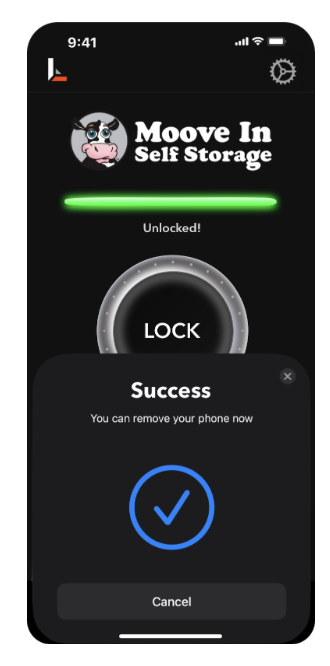
Once the bar turns green, you can remove your phone and move the metal slider down on the side of the lock to open.
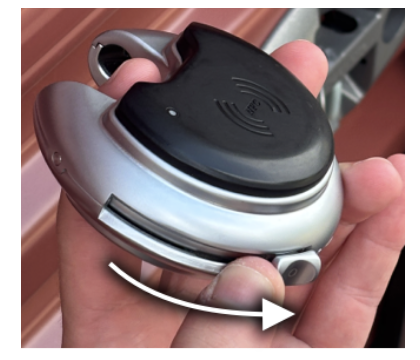
Slide down to open after scanning.
Locking Your Lock
To lock your lock, first make sure the unlock/lock toggle is switched to “Lock” and highlighted red. The slider does not need to be moved back prior to scanning in order to lock.
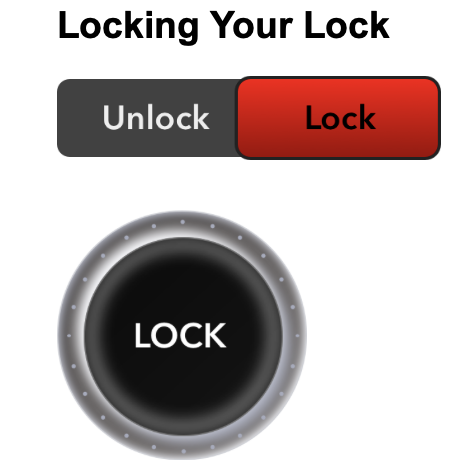
Then, press the LOCK button and repeat the NFC scanning steps. After the progress bar turns green, you can remove your phone and secure the lock back on the latch.
Lock Troubleshooting
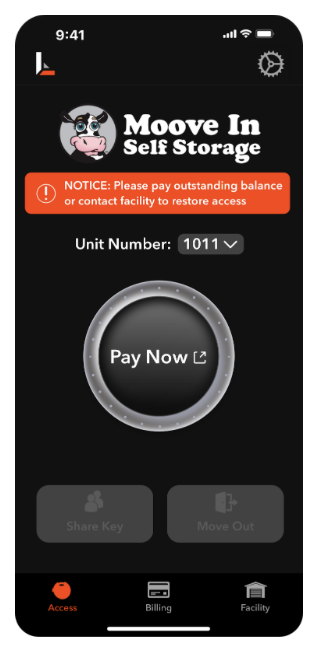
Unlock Button Not Available
If your access screen displays an orange NOTICE banner, then the facility’s records indicate that there is a past due balance for your unit that requires payment before access can be restored. Clicking the Pay Bill button will load the website where you can sign in and pay your balance. Once you’ve paid and your account becomes current, your access screen will allow you to use your lock again.
If you are seeing this screen and believe it is by error, please contact the facility to confirm the status of your account with them. If you have multiple units, you can still use the unit number dropdown to toggle between them. Please note that it is possible to have lost access to some units and not others depending on your payment schedules.
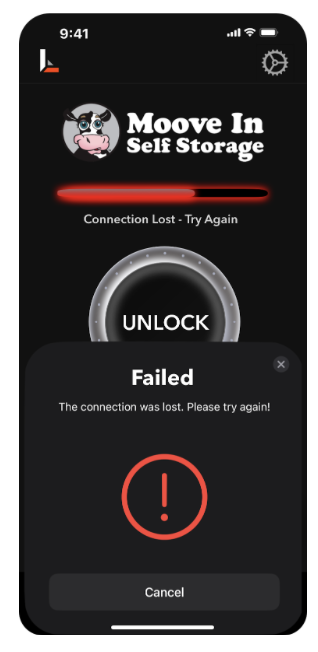
Failed Scan
Be sure to keep your phone still while the progress bar is filling, up until it turns green. If you move your phone away during the scan, the bar may turn red, and you’ll need to try again.
Scanning Time - Phone Cases
Scanning time may vary by phone model and case thickness. While removing your phone case is not required to use the lock, doing so may improve scanning time.
Android Users
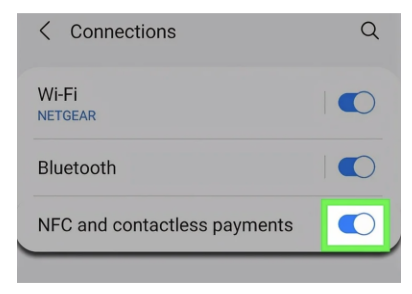
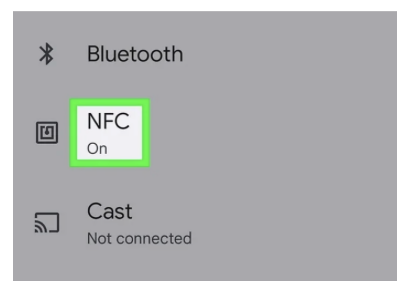
If you are using an Android phone and are unable to scan the lock at all, please ensure that NFC is turned on, by navigating to your phone’s Settings and searching NFC. Alternatively, you can navigate to the NFC toggle in settings. For Samsung phones: Settings → Connections → NFC and contactless payments, turn ON. For Google phones: Settings → Connected devices → Connection preferences → NFC, turn ON.
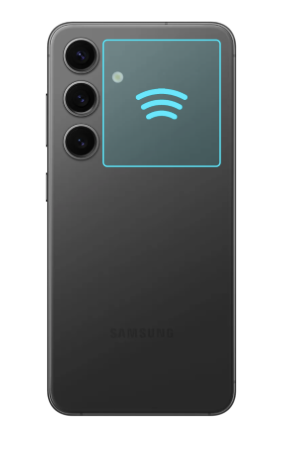
Samsung
NFC Detection Area
For best results, hold your phone against the lock close to the NFC detection area, just as you would for contactless payments. This is on the back of the phone, usually at the top-center, but can also be found by slowly moving your phone against the lock until a connection is established.
For iPhone models, the NFC detection area is at the top-center of the back of the phone.

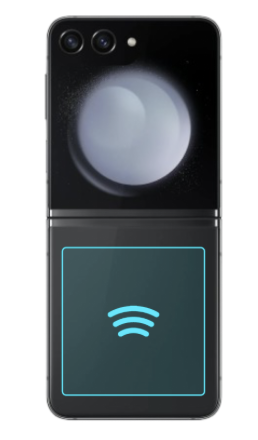
For Android phones, the NFC detection area can vary, but is typically at the top next to the camera. For some older models, it may instead be closer to the middle, and for Flip models, it is on the bottom panel of the phone. If you are unsure of your phone’s detection area, reposition the phone around the lock slowly until a connection is established.